In de inleiding van het Backup document staat een link naar:
HowToGeek: Don't Just Move Photos to an External Drive: That's NOT a Backup [April 2015]
Met de tekst: Backups Require Multiple Copies! Storing any type of important data in just one place is a mistake.
You need copies of your data in more than one place to have an actual backup.
De Odroid-HC is in november 2019 geïnstalleerd.
De Synology "DS409 slim" wordt sinds de zomer van 2009 gebruikt. De Odroid-HC heeft nu de voorkeur.
Zowel de Synology als de Odroid hebben nog een harddisk.
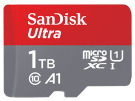
De gedachten voor een extra backup gaan uit naar een mini systeem (Pi-Zero) met een 1 TByte microSD card.
De netvoeding van de Synology "DS409 slim" ging de afgelopen 15 jaar twee keer stuk.
Een geluk is, dat deze een externe voeding van 12 Volt heeft met de standaard 5,5 mm plug.
Het wordt een probleem als de Synology zelf stuk gaat. De bestanden zitten in een database op de harddisk.
Anno 2025 is een microSD kaart ook een optie voor de backup, zie:
CT.nl: Raspberry Pi als NAS-systeem gebruiken? Dit moet je weten! [24 april, 2024]
Wist je dat je een Raspberry Pi als Network Attached Storage (NAS) kunt gebruiken? Zo voldoet de Raspberry Pi 4 aan de belangrijkste eisen om dit te kunnen doen.
In de tekst ook: Welke opslagmedia moet je nemen: een 'grote' microSD-kaart, een usb-stick, een externe ssd of een klassieke magnetische harde schijf?
Als onderdeel van de 3-2-1 backup strategie kan de FRITZ!Box gebruikt worden voor een offline backup.
Het medium kan via de gebruikersinterface eenvoudig aan- of los gekoppeld worden.
Een microSD kaart tot 4 TByte is geen probleem
Details:
Conklusie:
Een goed alternatief voor de Raspberry Pi Zero 2 W software is: DietPi.com: Highly optimised minimal Debian OS
DietPi is extremely lightweight at its core, with features of low process/memory footprint and DietPi-RAMlog installed by default, to get the maximum performance from your device.
Info: DietPi.com: blog ... discover DietPi, Debian and Linux info
![]() The new Raspberry Pi Zero 2 W – Why is DietPi a good match? [2021-11-20]
The new Raspberry Pi Zero 2 W – Why is DietPi a good match? [2021-11-20]
The newly available Raspberry Pi Zero 2 is a nice boost for the Raspberry Pi Zero family which is often used for smaller and headless applications. Due to the fact that the new Raspberry Pi Zero 2 keeps having only 512 MiB RAM, DietPi is a great choice with its small default memory footprint.
This article describes how to use the limited RAM on your Raspberry Pi Zero family efficiently for your applications.
Opmerkingen:
Omdat de Pi-NAS geen keyboard/muis/display krijgt, zocht ik naar een geschikte afstandsbediening.
Het beste resultaat was X2Go software, zie: Wikipedia.org: X2Go gives remote access to a Linux system's graphical user interface.

In de toekomst wil ik rsync gaan gebruiken voor de 'home' mappen van de veschillende Linux computers.
rsync is an open source utility that provides fast incremental file transfer.
rsync is freely available under the GNU General Public License and is currently being maintained by Wayne Davison.
Met rsync kan een maandelijkse automatische backup ingesteld worden van de Odroid-HC naar de Pi-NAS.
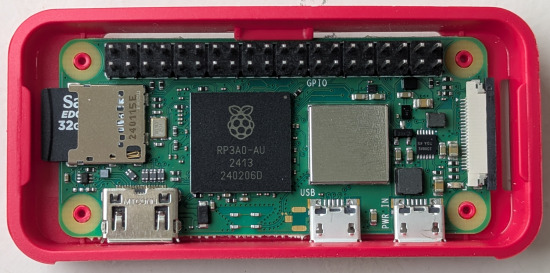
Specificaties:
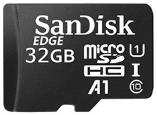
32GB microSD Geheugen voor operating systeem:
| SanDisk Edge 32GB |
|---|
 |
Firmware specificaties microSD: Ingebouwde ECC-functionaliteit (Error Correction Code),
Wear-Leveling, zie:
dataio.nl: White Paper: Western Digital Flash 101 and Flash Management [PDF}
Zie ook: Kingston.com: Get to know the features of the Industrial cards
Bad Block Management, ECC engine, Power Failure Protection, Dynamic Data Refresh, Garbage Collection, Wear levelling
Opmerkingen:
De Pi-NAS is niet zo snel door de WiFi netwerk chip.Hardware:
| SanDisk | Lexar |
|---|---|
 |
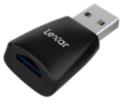 |
Voor het aansluiten van de microSD zocht ik nog naar tips op het internet.
De vorige identieke aktie was in 2019 een harddisk aansluiten, zie: Odroid-HC: Harddisk configuratie: partities, formatten
Voor de initialisatie van de microSD volgde ik in hoofdzaak de van handleiding, van Chris Cammack, zie:
ccammack: Install Ubuntu Server and Samba on the ODROID-HC1
The ODROID-HC1 is a simplified version of the ODROID-XU4 single-board computer that has been designed for use as a small headless server.
Help file voor fdisk:
Help:

  DOS (MBR)
   a   toggle a bootable flag
   b   edit nested BSD disklabel
   c   toggle the dos compatibility flag

  Generic
   d   delete a partition
   F   list free unpartitioned space
   l   list known partition types
   n   add a new partition
   p   print the partition table
   t   change a partition type
   v   verify the partition table
   i   print information about a partition

  Misc
   m   print this menu
   u   change display/entry units
   x   extra functionality (experts only)

  Script
   I   load disk layout from sfdisk script file
   O   dump disk layout to sfdisk script file

  Save & Exit
   w   write table to disk and exit
   q   quit without saving changes

  Create a new label
   g   create a new empty GPT partition table
   G   create a new empty SGI (IRIX) partition table
   o   create a new empty MBR (DOS) partition table
   s   create a new empty Sun partition table
Configuratie microSD:
frits@Pi-NAS:~$ sudo fdisk -l
[sudo] password for frits: geheim
Disk /dev/ram0: 4 MiB, 4194304 bytes, 8192 sectors
Units: sectors of 1 * 512 = 512 bytes
Sector size (logical/physical): 512 bytes / 4096 bytes
I/O size (minimum/optimal): 4096 bytes / 4096 bytes


Disk /dev/ram1: 4 MiB, 4194304 bytes, 8192 sectors
Units: sectors of 1 * 512 = 512 bytes
Sector size (logical/physical): 512 bytes / 4096 bytes
I/O size (minimum/optimal): 4096 bytes / 4096 bytes


Disk /dev/ram2: 4 MiB, 4194304 bytes, 8192 sectors
Units: sectors of 1 * 512 = 512 bytes
Sector size (logical/physical): 512 bytes / 4096 bytes
I/O size (minimum/optimal): 4096 bytes / 4096 bytes


Disk /dev/ram3: 4 MiB, 4194304 bytes, 8192 sectors
Units: sectors of 1 * 512 = 512 bytes
Sector size (logical/physical): 512 bytes / 4096 bytes
I/O size (minimum/optimal): 4096 bytes / 4096 bytes


Disk /dev/ram4: 4 MiB, 4194304 bytes, 8192 sectors
Units: sectors of 1 * 512 = 512 bytes
Sector size (logical/physical): 512 bytes / 4096 bytes
I/O size (minimum/optimal): 4096 bytes / 4096 bytes


Disk /dev/ram5: 4 MiB, 4194304 bytes, 8192 sectors
Units: sectors of 1 * 512 = 512 bytes
Sector size (logical/physical): 512 bytes / 4096 bytes
I/O size (minimum/optimal): 4096 bytes / 4096 bytes


Disk /dev/ram6: 4 MiB, 4194304 bytes, 8192 sectors
Units: sectors of 1 * 512 = 512 bytes
Sector size (logical/physical): 512 bytes / 4096 bytes
I/O size (minimum/optimal): 4096 bytes / 4096 bytes


Disk /dev/ram7: 4 MiB, 4194304 bytes, 8192 sectors
Units: sectors of 1 * 512 = 512 bytes
Sector size (logical/physical): 512 bytes / 4096 bytes
I/O size (minimum/optimal): 4096 bytes / 4096 bytes


Disk /dev/ram8: 4 MiB, 4194304 bytes, 8192 sectors
Units: sectors of 1 * 512 = 512 bytes
Sector size (logical/physical): 512 bytes / 4096 bytes
I/O size (minimum/optimal): 4096 bytes / 4096 bytes


Disk /dev/ram9: 4 MiB, 4194304 bytes, 8192 sectors
Units: sectors of 1 * 512 = 512 bytes
Sector size (logical/physical): 512 bytes / 4096 bytes
I/O size (minimum/optimal): 4096 bytes / 4096 bytes


Disk /dev/ram10: 4 MiB, 4194304 bytes, 8192 sectors
Units: sectors of 1 * 512 = 512 bytes
Sector size (logical/physical): 512 bytes / 4096 bytes
I/O size (minimum/optimal): 4096 bytes / 4096 bytes


Disk /dev/ram11: 4 MiB, 4194304 bytes, 8192 sectors
Units: sectors of 1 * 512 = 512 bytes
Sector size (logical/physical): 512 bytes / 4096 bytes
I/O size (minimum/optimal): 4096 bytes / 4096 bytes


Disk /dev/ram12: 4 MiB, 4194304 bytes, 8192 sectors
Units: sectors of 1 * 512 = 512 bytes
Sector size (logical/physical): 512 bytes / 4096 bytes
I/O size (minimum/optimal): 4096 bytes / 4096 bytes


Disk /dev/ram13: 4 MiB, 4194304 bytes, 8192 sectors
Units: sectors of 1 * 512 = 512 bytes
Sector size (logical/physical): 512 bytes / 4096 bytes
I/O size (minimum/optimal): 4096 bytes / 4096 bytes


Disk /dev/ram14: 4 MiB, 4194304 bytes, 8192 sectors
Units: sectors of 1 * 512 = 512 bytes
Sector size (logical/physical): 512 bytes / 4096 bytes
I/O size (minimum/optimal): 4096 bytes / 4096 bytes


Disk /dev/ram15: 4 MiB, 4194304 bytes, 8192 sectors
Units: sectors of 1 * 512 = 512 bytes
Sector size (logical/physical): 512 bytes / 4096 bytes
I/O size (minimum/optimal): 4096 bytes / 4096 bytes


Disk /dev/mmcblk0: 29.72 GiB, 31914983424 bytes, 62333952 sectors
Units: sectors of 1 * 512 = 512 bytes
Sector size (logical/physical): 512 bytes / 512 bytes
I/O size (minimum/optimal): 512 bytes / 512 bytes
Disklabel type: dos
Disk identifier: 0x48d9bb3b

Device         Boot  Start      End  Sectors  Size Id Type
/dev/mmcblk0p1 *      2048   264191   262144  128M  c W95 FAT32 (LBA)
/dev/mmcblk0p2      264192 62333951 62069760 29.6G 83 Linux


Disk /dev/sda: 953.68 GiB, 1024005767168 bytes, 2000011264 sectors
Disk model: MassStorageClass
Units: sectors of 1 * 512 = 512 bytes
Sector size (logical/physical): 512 bytes / 512 bytes
I/O size (minimum/optimal): 512 bytes / 512 bytes
Disklabel type: dos
Disk identifier: 0x00000000

Device     Boot  Start        End    Sectors   Size Id Type
/dev/sda1       131072 2000011263 1999880192 953.6G  7 HPFS/NTFS/exFAT
De microSD is /dev/sda: 953.68 GiB
Er zijn flink wat "ramxx" devices!
frits@Pi-NAS:~$ sudo fdisk /dev/sda
Command (m for help): d
Selected partition 1
Partition 1 has been deleted.

Command (m for help): n
Partition type
   p   primary (0 primary, 0 extended, 4 free)
   e   extended (container for logical partitions)
Select (default p): p
Partition number (1-4, default 1): 1
First sector (2048-2000011263, default 2048):
Last sector, +/-sectors or +/-size{K,M,G,T,P} (2048-2000011263, default 2000011263):

Created a new partition 1 of type 'Linux' and of size 953.7 GiB.
frits@Pi-NAS:~$ sudo mkfs -t ext4 /dev/sda1
mke2fs 1.47.0 (5-Feb-2023)
Creating filesystem with 250001152 4k blocks and 62504960 inodes
Filesystem UUID: 3dcc3b13-3fea-4c69-bc8e-2090dc488b80
Superblock backups stored on blocks:
	32768, 98304, 163840, 229376, 294912, 819200, 884736, 1605632, 2654208,
	4096000, 7962624, 11239424, 20480000, 23887872, 71663616, 78675968,
	102400000, 214990848

Allocating group tables: done
Writing inode tables: done
Creating journal (262144 blocks): done
Writing superblocks and filesystem accounting information: done

frits@Pi-NAS:~$ sudo blkid /dev/sda1
/dev/sda1: UUID="3dcc3b13-3fea-4c69-bc8e-2090dc488b80" BLOCK_SIZE="4096" TYPE="ext4"
Het toevoegen van de microSD aan de file /etc/fstab gaf een probleem.
De laatste stap in bovenstaande handleiding (zie ook Odroid-HC) werkte niet in dit geval, dus:
Handmatig mounten:
frits@Pi-NAS:~$ sudo mount /dev/sda1 /media/microsd
frits@Pi-NAS:~$ sudo chown -R frits:frits /media/microsd
frits@Pi-NAS:~$ df -h
Filesystem      Size  Used Avail Use% Mounted on
/dev/root        30G  2.7G   26G  10% /
devtmpfs        182M     0  182M   0% /dev
tmpfs           214M     0  214M   0% /dev/shm
tmpfs            86M  2.0M   84M   3% /run
tmpfs           5.0M     0  5.0M   0% /run/lock
tmpfs           1.0G  4.0K  1.0G   1% /tmp
tmpfs            50M  4.0K   50M   1% /var/log
/dev/mmcblk0p1  127M   52M   76M  41% /boot
tmpfs            43M  4.0K   43M   1% /run/user/1001
tmpfs            43M  8.0K   43M   1% /run/user/103
/dev/sda1       938G   28K  890G   1% /media/microsd
frits@Pi-NAS:~$ ls -l /media/microsd
total 16
drwx------ 2 frits frits 16384 Mar 12 16:56 lost+found
Nuttige sites:

DietPi is een image voor onder andere de Raspberry Pi, een minimaal Debian OS.
DietPi is extremely lightweight at its core, with features of low process/memory footprint and DietPi-RAMlog installed by default, to get the maximum performance from your device.
Een stappenplan voor de installatie staat op de website: DietPi.com/blog: Install a DietPi desktop system in a few steps
The DietPi base installation basically focuses on headless resp. machines without a graphical user interface (GUI) dealing with server applications like Nextcloud, Pi-hole, media servers, etc.
Network-configuration:
Aanpassingen: dietpi-wifi.txt
Aanpassingen System: dietpi.txt
Aanpassingen: [oude waarden]
Eerste boot vanuit de Dell laptop:
frits@Dell-G15:~$ ssh root@192.168.178.48
The authenticity of host '192.168.178.48 (192.168.178.48)' can't be established.
ED25519 key fingerprint is SHA256:ABCDEFGHIJKLMNOPQRSTUVWXYZ+-1234567890acbce.
This key is not known by any other names
Are you sure you want to continue connecting (yes/no/[fingerprint])? yes
Warning: Permanently added '192.168.178.48' (ED25519) to the list of known hosts.
root@192.168.178.48's password: dietpi

The programs included with the Debian GNU/Linux system are free software;
the exact distribution terms for each program are described in the
individual files in /usr/share/doc/*/copyright.

Debian GNU/Linux comes with ABSOLUTELY NO WARRANTY, to the extent
permitted by applicable law.
 ─────────────────────────────────────────────────────
 DietPi v9.10.0 : 15:19 - Sat 02/15/25
 ─────────────────────────────────────────────────────
 - LAN IP : 192.168.178.48 (wlan0)

 DietPi-Update
─────────────────────────────────────────────────────
 Phase: Checking for available DietPi update

[  OK  ] DietPi-Update | Checking IPv4 network connectivity
[  OK  ] DietPi-Update | Checking DNS resolver
[  OK  ] DietPi-TimeSync | systemctl stop systemd-timesyncd
[  OK  ] DietPi-TimeSync | mkdir -p /run/systemd/timesync
[ INFO ] DietPi-Update | Getting latest version from: https://raw.githubusercontent.com/MichaIng/DietPi/master/.update/version
[  OK  ] DietPi-Update | Got valid latest version: 9.10.0
[  OK  ] DietPi-Update | eval echo 1 > /boot/dietpi/.install_stage
[  OK  ] DietPi-Update | No update required, your DietPi installation is already up to date:
[ INFO ] DietPi-Update | Current version : v9.10.0
[ INFO ] DietPi-Update | Latest version  : v9.10.0
[ INFO ] DietPi-Update | Checking for new available live patches
[  OK  ] DietPi-Update | Added setting G_LIVE_PATCH_STATUS[1]='not applicable' to end of file /boot/dietpi/.version
[  OK  ] DietPi-Update | Added setting G_LIVE_PATCH_STATUS[2]='not applicable' to end of file /boot/dietpi/.version
[ INFO ] DietPi-Update | APT update, please wait...
Get:1 https://deb.debian.org/debian bookworm InRelease [151 kB]
Get:2 https://deb.debian.org/debian bookworm-updates InRelease [55.4 kB]
Get:3 https://deb.debian.org/debian-security bookworm-security InRelease [48.0 kB]
Get:4 https://dietpi.com/apt bookworm InRelease [3538 B]
...
 X2Go.org: ... New to X2Go? ... Start here! X2Go enables you to access a graphical desktop of a computer over a low bandwidth (or high bandwidth) connection.
X2Go is a Remote Desktop solution, which some vendors vaguely call Remote Control.
With X2Go, you mainly access Linux computers. The Linux computer you are accessing is the X2Go Server.
You can connect from a computer running Linux, Windows or Mac OS X. This computer is the X2Go Client.
Installatie via een ssh verbinding met de pi-nas:
root@pi-nas:~$ apt-get install x2goserver x2goserver-xsession
Reading package lists... Done
Building dependency tree... Done
Reading state information... Done
The following additional packages will be installed:
  bc libcapture-tiny-perl libconfig-simple-perl libdbd-sqlite3-perl libdbi-perl libfile-basedir-perl libfile-which-perl libfontenc1
  libgdbm-compat4 libgdbm6 libipc-system-simple-perl libnx-x11-6 libperl5.36 libswitch-perl libtry-tiny-perl libx2go-config-perl
  libx2go-log-perl libx2go-server-db-perl libx2go-server-perl libx2go-utils-perl libxcomp3 libxcompshad3 libxfont2 libxtst6 lsof net-tools
  nx-x11-common nxagent perl perl-modules-5.36 pwgen x2goserver-common x2goserver-x2goagent xauth
Suggested packages:
  libclone-perl libmldbm-perl libnet-daemon-perl libsql-statement-perl gdbm-l10n libsub-name-perl perl-doc libterm-readline-gnu-perl
  | libterm-readline-perl-perl make libtap-harness-archive-perl pulseaudio-utils rdesktop
Recommended packages:
  xfonts-base netbase sshfs x11-apps x11-session-utils x11-utils x11-xfs-utils x2goserver-extensions x2goserver-fmbindings
  x2goserver-printing xinit
The following NEW packages will be installed:
  bc libcapture-tiny-perl libconfig-simple-perl libdbd-sqlite3-perl libdbi-perl libfile-basedir-perl libfile-which-perl libfontenc1
  libgdbm-compat4 libgdbm6 libipc-system-simple-perl libnx-x11-6 libperl5.36 libswitch-perl libtry-tiny-perl libx2go-config-perl
  libx2go-log-perl libx2go-server-db-perl libx2go-server-perl libx2go-utils-perl libxcomp3 libxcompshad3 libxfont2 libxtst6 lsof net-tools
  nx-x11-common nxagent perl perl-modules-5.36 pwgen x2goserver x2goserver-common x2goserver-x2goagent x2goserver-xsession xauth
0 upgraded, 36 newly installed, 0 to remove and 0 not upgraded.
Need to get 12.2 MB of archives.
After this operation, 53.9 MB of additional disk space will be used.
Do you want to continue? [Y/n] Y
Get:1 https://deb.debian.org/debian bookworm/main armhf perl-modules-5.36 all 5.36.0-7+deb12u1 [2815 kB]
Get:2 https://deb.debian.org/debian bookworm/main armhf libgdbm6 armhf 1.23-3 [68.5 kB]
Get:3 https://deb.debian.org/debian bookworm/main armhf libgdbm-compat4 armhf 1.23-3 [47.8 kB]
Get:4 https://deb.debian.org/debian bookworm/main armhf libperl5.36 armhf 5.36.0-7+deb12u1 [3501 kB]
Get:5 https://deb.debian.org/debian bookworm/main armhf perl armhf 5.36.0-7+deb12u1 [239 kB]
Get:6 https://deb.debian.org/debian bookworm/main armhf bc armhf 1.07.1-3 [104 kB]
...
Get:35 https://deb.debian.org/debian bookworm/main armhf x2goserver armhf 4.1.0.3-7+deb12u1 [114 kB]
Get:36 https://deb.debian.org/debian bookworm/main armhf x2goserver-xsession all 4.1.0.3-7+deb12u1 [47.1 kB]
Fetched 12.2 MB in 3s (3795 kB/s)
debconf: delaying package configuration, since apt-utils is not installed
Selecting previously unselected package perl-modules-5.36.
(Reading database ... 33945 files and directories currently installed.)
Preparing to unpack .../00-perl-modules-5.36_5.36.0-7+deb12u1_all.deb ...
Unpacking perl-modules-5.36 (5.36.0-7+deb12u1) ...
...
Setting up x2goserver-common (4.1.0.3-7+deb12u1) ...
Creating x2gouser group.
Adding group `x2gouser' (GID 109) ...
Done.
Creating x2gouser user.
Adding system user `x2gouser' (UID 102) ...
Adding new user `x2gouser' (UID 102) with group `x2gouser' ...
Not creating home directory `/var/lib/x2go'.
Setting up bc (1.07.1-3) ...
Setting up libfontenc1:armhf (1:1.1.4-1) ...
Setting up perl-modules-5.36 (5.36.0-7+deb12u1) ...
Setting up nx-x11-common (2:3.5.99.26-5+deb12u1) ...
...
Setting up libx2go-log-perl (4.1.0.3-7+deb12u1) ...
Setting up libdbd-sqlite3-perl:armhf (1.72-1) ...
Setting up libx2go-server-db-perl (4.1.0.3-7+deb12u1) ...
Setting up libx2go-server-perl (4.1.0.3-7+deb12u1) ...
Setting up x2goserver (4.1.0.3-7+deb12u1) ...
Created symlink /etc/systemd/system/multi-user.target.wants/x2goserver.service → /lib/systemd/system/x2goserver.service.
Setting up x2goserver-xsession (4.1.0.3-7+deb12u1) ...
Processing triggers for libc-bin (2.36-9+rpt2+deb12u9) ...
Processing triggers for fontconfig (2.14.1-4) ...
...
Installatie op de Dell-G15 :
frits@Dell-G15:~$ sudo apt-get install x2goclient
[sudo] wachtwoord voor frits: <geheim>
Pakketlijsten worden ingelezen... Klaar
Boom van vereisten wordt opgebouwd... Klaar
De statusinformatie wordt gelezen... Klaar
De volgende extra pakketten zullen geïnstalleerd worden:
  libxcomp3 ncurses-term nxproxy openssh-server openssh-sftp-server rdesktop ssh-import-id
Voorgestelde pakketten:
  molly-guard monkeysphere ssh-askpass pcscd pinentry-x2go
De volgende NIEUWE pakketten zullen geïnstalleerd worden:
  libxcomp3 ncurses-term nxproxy openssh-server openssh-sftp-server rdesktop ssh-import-id x2goclient
0 opgewaardeerd, 8 nieuw geïnstalleerd, 0 te verwijderen en 0 niet opgewaardeerd.
Er moeten 2.629 kB aan archieven opgehaald worden.
Na deze bewerking zal er 10,8 MB extra schijfruimte gebruikt worden.
Wilt u doorgaan? [J/n] J
Ophalen:1 http://nl.archive.ubuntu.com/ubuntu jammy-updates/main amd64 openssh-sftp-server amd64 1:8.9p1-3ubuntu0.10 [38,9 kB]
Ophalen:2 http://nl.archive.ubuntu.com/ubuntu jammy-updates/main amd64 openssh-server amd64 1:8.9p1-3ubuntu0.10 [435 kB]
Ophalen:3 http://nl.archive.ubuntu.com/ubuntu jammy/universe amd64 libxcomp3 amd64 2:3.5.99.26-5 [498 kB]
Ophalen:4 http://nl.archive.ubuntu.com/ubuntu jammy-updates/main amd64 ncurses-term all 6.3-2ubuntu0.1 [267 kB]
Ophalen:5 http://nl.archive.ubuntu.com/ubuntu jammy/universe amd64 nxproxy amd64 2:3.5.99.26-5 [34,2 kB]
Ophalen:6 http://nl.archive.ubuntu.com/ubuntu jammy/universe amd64 rdesktop amd64 1.9.0-2build1 [220 kB]
Ophalen:7 http://nl.archive.ubuntu.com/ubuntu jammy/main amd64 ssh-import-id all 5.11-0ubuntu1 [10,1 kB]
Ophalen:8 http://nl.archive.ubuntu.com/ubuntu jammy/universe amd64 x2goclient amd64 4.1.2.2-2build1 [1.125 kB]
2.629 kB opgehaald in 1s (4.887 kB/s)
Voorconfigureren van pakketten ...
Voorheen niet geselecteerd pakket openssh-sftp-server wordt geselecteerd.
(Database wordt ingelezen ... 256782 bestanden en mappen momenteel geïnstalleerd.)
Uitpakken van .../0-openssh-sftp-server_1%3a8.9p1-3ubuntu0.10_amd64.deb wordt voorbereid...
Bezig met uitpakken van openssh-sftp-server (1:8.9p1-3ubuntu0.10) ...
Voorheen niet geselecteerd pakket openssh-server wordt geselecteerd.
Uitpakken van .../1-openssh-server_1%3a8.9p1-3ubuntu0.10_amd64.deb wordt voorbereid...
...
Bezig met uitpakken van x2goclient (4.1.2.2-2build1) ...
Instellen van openssh-sftp-server (1:8.9p1-3ubuntu0.10) ...
Instellen van libxcomp3:amd64 (2:3.5.99.26-5) ...
Instellen van openssh-server (1:8.9p1-3ubuntu0.10) ...
...
Creating config file /etc/ssh/sshd_config with new version
Creating SSH2 RSA key; this may take some time ...
3072 SHA256:ABCDEFGHIJKLMNOPQRSTUVWXYZ+-1234567890acbce root@Dell-G15 (RSA)
Creating SSH2 ECDSA key; this may take some time ...
256 SHA256:ABCDEFGHIJKLMNOPQRSTUVWXYZ+-1234567890acbce root@Dell-G15 (ECDSA)
Creating SSH2 ED25519 key; this may take some time ...
256 SHA256:ABCDEFGHIJKLMNOPQRSTUVWXYZ+-1234567890acbce root@Dell-G15 (ED25519)
Created symlink /etc/systemd/system/sshd.service → /lib/systemd/system/ssh.service.
Created symlink /etc/systemd/system/multi-user.target.wants/ssh.service → /lib/systemd/system/ssh.service.
rescue-ssh.target is a disabled or a static unit, not starting it.
ssh.socket is a disabled or a static unit, not starting it.
Instellen van ssh-import-id (5.11-0ubuntu1) ...
Instellen van rdesktop (1.9.0-2build1) ...
Instellen van nxproxy (2:3.5.99.26-5) ...
Instellen van x2goclient (4.1.2.2-2build1) ...
Instellen van ncurses-term (6.3-2ubuntu0.1) ...
Bezig met afhandelen van triggers voor hicolor-icon-theme (0.17-2) ...
Bezig met afhandelen van triggers voor gnome-menus (3.36.0-1ubuntu3) ...
Bezig met afhandelen van triggers voor libc-bin (2.35-0ubuntu3.9) ...
Bezig met afhandelen van triggers voor ufw (0.36.1-4ubuntu0.1) ...
Bezig met afhandelen van triggers voor man-db (2.10.2-1) ...
Bezig met afhandelen van triggers voor mailcap (3.70+nmu1ubuntu1) ...
Bezig met afhandelen van triggers voor desktop-file-utils (0.26-1ubuntu3) ...
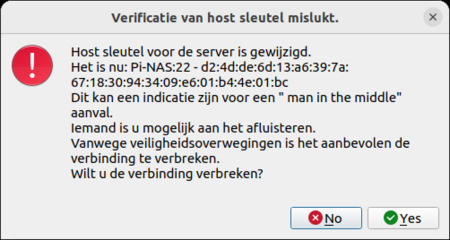

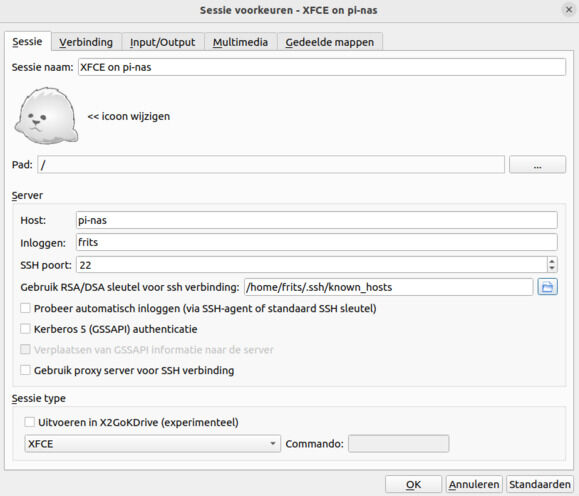
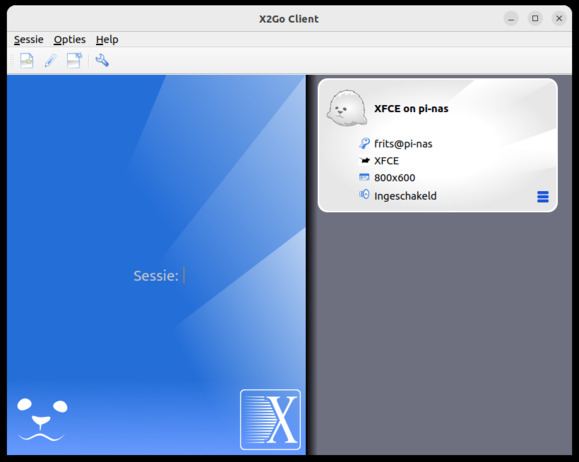


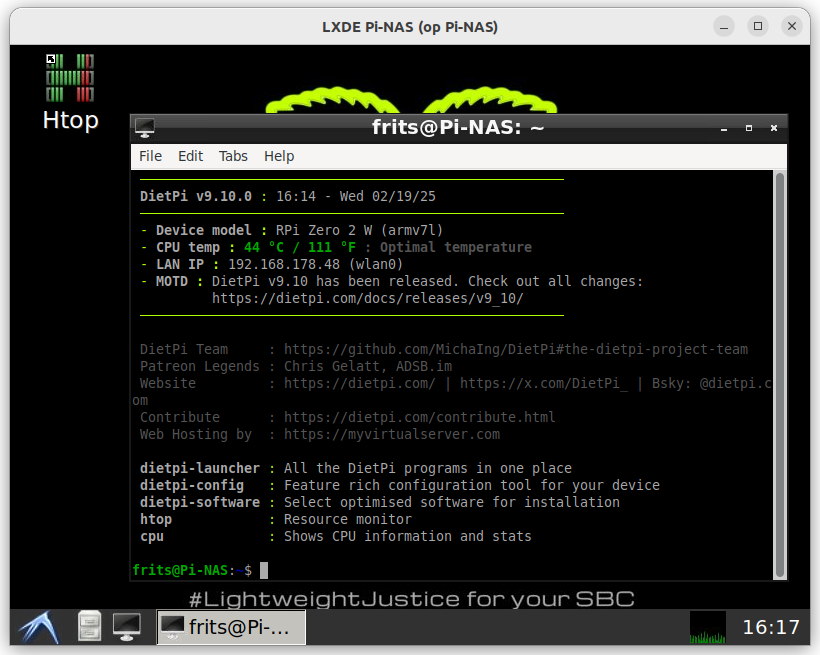
Voor de details, zie de website:
DietPi.com/blog: File Browser: A lightweight storage option in DietPi [2025-02-14]
Searching for a lightweight and powerful cloud storage system for a DietPi system which is easier to handle than Nextcloud?
Zie ook de website: FileBrowser.org: File Browser provides a file managing interface within a specified directory and it can be used to upload, delete, preview and edit your files.
It is a create-your-own-cloud-kind of software where you can just install it on your server, direct it to a path and access your files through a nice web interface.
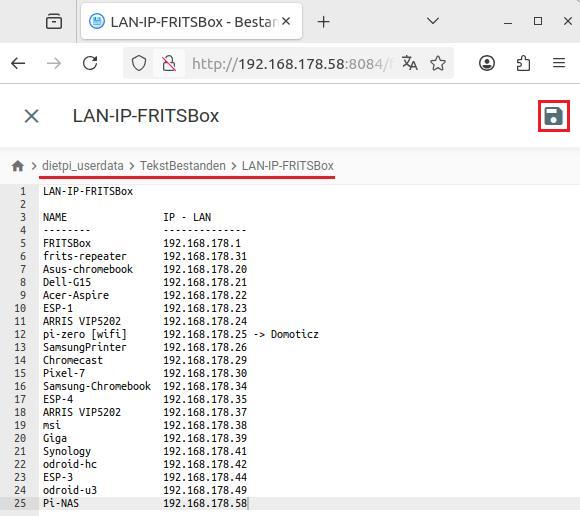
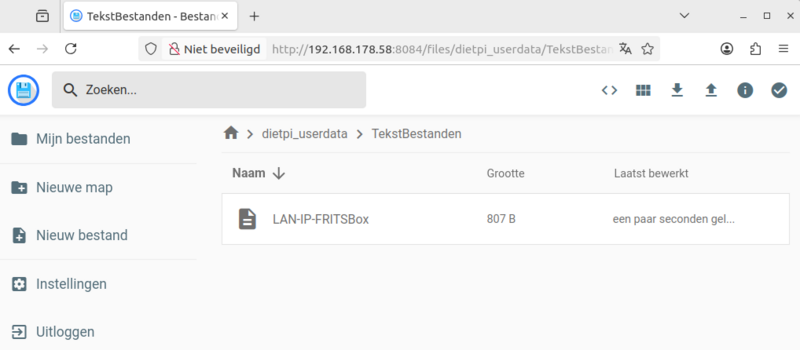
Resultaat van de eerste setup was het opslaan van de IP adressen van het lokale FritsBox netwerk, zie het bestand: "LAN-IP-FRITSBox"
Het floppy icoon is om het bestand op te slaan!
Resultaat:
Lang geleden, in 2000 gebruikte ik in windows XP "KeyPass", zie: Tips: KeyPass, 'open source' software voor het opslaan van wachtwoorden.
In die tijd was één computer de standaard.
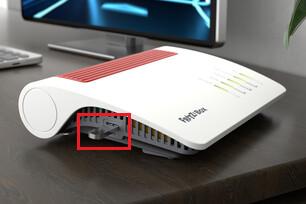 De FRITZ!Box heeft een snelle USB 3.0 aansluiting voor een opslagmedium.
Fritz.com: USB-opslagmedium configureren dat op FRITZ!Box is aangesloten.
Met de FRITZ!Box kun je een aangesloten USB-opslagmedium gebruiken als centrale opslaglocatie ("Opslag (NAS)") in het thuisnetwerk. Je hebt dan vanaf alle computers, smartphones en andere apparaten die met de FRITZ!Box zijn verbonden heel eenvoudig via een webbrowser
Fritz.com-nl: Je eigen cloudopslag met FRITZ!Box
Met FRITZ!NAS worden je gegevens niet op het internet opgeslagen. Privéfoto’s, video’s en andere bestanden bevinden zich op het op de FRITZ!Box aangesloten USB-opslagmedium, waar derden niet bij kunnen. Je gegevens zijn alleen opgeslagen in je thuisnetwerk, waar je ze via een beveiligd kanaal van overal kunt benaderen.
Ook relevant:
Fritz.com-nl: Via FTP vanuit het internet toegang tot opslag (NAS)
Als je de opslagfunctie (NAS) gebruikt, kun je toestaan dat FTP-clients, zoals bijvoorbeeld FileZilla of WinSCP, toegang hebben tot bepaalde inhoud van opslagmedia die zijn verbonden met de FRITZ!Box.
CT.nl: Je Fritzbox als NAS [16 december, 2019]
De meeste Fritzbox-routers zijn voorzien van een of twee usb-poorten. Als je je ooit hebt afgevraagd waar deze voor zijn, dan ligt er een leuk project voor je in het verschiet: want met een usb-opslag tover je de Fritzbox om tot een NAS.
Logon Pi-NAS: eind mei [2025], upgrade beschikbaar!
frits@Dell-G15:~$ ssh root@192.168.178.58
root@192.168.178.58's password: geheim
Linux Pi-NAS 6.12.25+rpt-rpi-v7 #1 SMP Raspbian 1:6.12.25-1+rpt1 (2025-04-30) armv7l

The programs included with the Debian GNU/Linux system are free software;
the exact distribution terms for each program are described in the
individual files in /usr/share/doc/*/copyright.

Debian GNU/Linux comes with ABSOLUTELY NO WARRANTY, to the extent
permitted by applicable law.
 ─────────────────────────────────────────────────────
 DietPi v9.10.0 : 15:29 - Thu 05/29/25
 ─────────────────────────────────────────────────────
 - Device model : RPi Zero 2 W (armv7l)
 - CPU temp : 41 °C / 105 °F : Optimal temperature
 - LAN IP : 192.168.178.58 (wlan0)
 - MOTD : DietPi v9.13 has been released. Check out all changes:
          https://dietpi.com/docs/releases/v9_13/
 ─────────────────────────────────────────────────────

 DietPi Team     : https://github.com/MichaIng/DietPi#the-dietpi-project-team
 Patreon Legends : Chris Gelatt, ADSB.im
 Website         : https://dietpi.com/ | https://x.com/DietPi_ | Bsky: @dietpi.com
 Contribute      : https://dietpi.com/contribute.html
 Web Hosting by  : https://login-online.com/

 dietpi-launcher : All the DietPi programs in one place
 dietpi-config   : Feature rich configuration tool for your device
 dietpi-software : Select optimised software for installation
 htop            : Resource monitor
 cpu             : Shows CPU information and stats
Documentatie nieuwe versie: DietPi.com: May 2025 (version 9.13)
The May 25th, 2025 release of DietPi v9.13 enforces the change of the default password for users and software installs, and comes with a lot of upgrades and fixes for various SBC kernels and bootloaders.
Upgrade, zie: DietPi.com: system_maintenance
Update DietPi OS version to the latest version available and informs when updates for apt upgrade are available. To start DietPi-Update, use the following command: dietpi-update
root@Pi-NAS:~# dietpi-update ┌─────────────────────────────────────────────────┤ DietPi-Update ├─────────────────────────────────────────────────┐ │ Update available: │ │ - Current version : v9.10.0 │ │ - Latest version : v9.13.2 │ │ │ │ Please select 'Update' option to apply the update. │ │ │ │ ●─ Update DietPi ───────────────────────● │ │ Update : Apply update to: v9.13.2 │ │ ●─ Additional Options ──────────────────● │ │ Changelog : View recent changelog and patch notes. │ │ Backup : Create a system backup before updating. │ │ │ │ │ │ <Select> <Exit> │ │ │ └───────────────────────────────────────────────────────────────────────────────────────────────────────────────────┘ ┌──────────────────────────────┤ DietPi-Update ├───────────────────────────────┐ │ │ │ >----------------------------------Notice----------------------------------< │ │ - A benefit of DietPi is: We use standard Linux (Debian) configurations and │ │ commands. │ │ - A potential downside is: We can't possibly accommodate or predict all │ │ modification to Linux configurations files by the end user, outside of │ │ DietPi programs, during updates. │ │ │ │ Although we test the updates thoroughly, if you have made any custom changes │ │ to Linux configuration files outside of the DietPi programs, an update may │ │ trigger a potential issue. │ │ >--------------------------------------------------------------------------< │ │ │ │ Do you wish to continue and update DietPi to v9.13.2? │ │ │ │ <Ok> <Cancel> │ │ │ └──────────────────────────────────────────────────────────────────────────────┘ ┌───────────────────────────────────────────────────┤ DietPi-Patch ├───────────────────────────────────────────────────┐ │ │ │ [ INFO ] Raspberry Pi kernel/firmware migration available │ │ │ │ With Raspberry Pi OS Bookworm, a new Linux 6.12+ kernel and firmware stack is available for Raspberry Pi systems, │ │ which as well enables support for the Raspberry Pi 5. │ │ │ │ We created a migration script which has been tested for over a year to move from the old Linux 6.1 stack to the new │ │ one, and are now certain it is stable to be rolled out for all Raspberry Pi users. │ │ │ │ There are some minor limitations, like the removal of display settings for the legacy RPi display driver. We created │ │ a new tool "dietpi-display" to change display mode and rotation with the KMS/DRM display driver, to address this │ │ limitation, and make the same options available to all other hardware models at the same time. │ │ │ │ Do you want to perform the RPi kernel/firmware migration now? │ │ │ │ This can be done any time later via dietpi-config > Advanced Options > RPi firmware migration. │ │ │ │ <Ok> <Later> │ │ │ └──────────────────────────────────────────────────────────────────────────────────────────────────────────────────────┘ ┌───────────────────────────────────────────────┤ DietPi-Set_software ├────────────────────────────────────────────────┐ │ Based on your currently used kernel variant, the following package will be kept/installed: │ │ │ │ - linux-image-rpi-v7 for Raspberry Pi 2/3/Zero 2 │ │ │ │ Optionally, you can select/deselect additional kernel packages below, in case you want to boot this image from other │ │ Raspberry Pi models: │ │ │ │ [ ] linux-image-rpi-v8 Raspberry Pi 4/5 │ │ [ ] linux-image-rpi-v6 Raspberry Pi 1/Zero (1) │ │ │ │ <Confirm> <Cancel> │ │ │ └──────────────────────────────────────────────────────────────────────────────────────────────────────────────────────┘ ┌──────────────────────────────────────────────────┤ DietPi-Update ├───────────────────────────────────────────────────┐ │ │ │ [ INFO ] A reboot is recommended │ │ │ │ Kernel modules for the loaded kernel at /lib/modules/6.1.21-v7+ are missing. This is most likely the case as of a │ │ recently applied kernel upgrade where a reboot is required to load the new kernel. │ │ │ │ We recommend to perform a reboot now for the system to be able to load kernel modules ondemand. If your kernel does │ │ not use dedicated modules, please create the mentioned directory manually to mute this info in the future. │ │ │ │ Do you want to reboot now? │ │ │ │ <Ok> <Skip> │ │ │ └──────────────────────────────────────────────────────────────────────────────────────────────────────────────────────┘
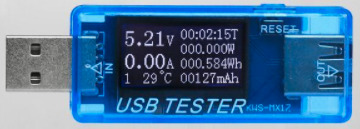
Het stroomverbruik van de Pi Zero is gemeten met een USB-tester, zie: details IoT: power tester KWS-MX17
De ruststroom is ca 100 mA, bij opstarten en tijdens een installatie is het stroomverbruik ca 200 a 230 mA.
Tot mijn verbazing kreeg ik een foutmelding:
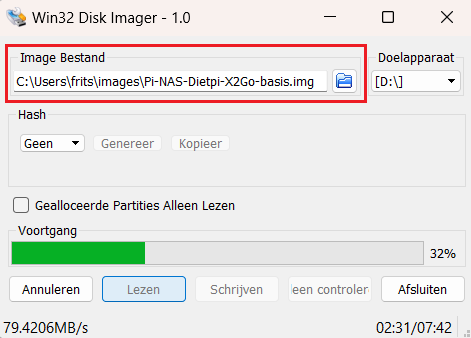
In januari [2025] gebruikte ik het pad C:\Users\frits\Images\... voor de backup
In februari gebruikte ik het pad C:\Gebruikers\frits\Images\... voor een backup. Dit werkte niet!
Hoewel Windows op de Nederlandse taal is ingesteld, moet voor de backup de "Users" directory gebruikt worden!
Voortgang backup:
Opmerkingen:
In bovenstaand geval werd een backup van een microSD naar een "Image" bestand gemaakt.
Doorgaans wordt Win32 Disk Imager om een image naar een geheugenkaart te kopiëren.
Vandaar de benamingen "Doelapparaat" en "Image bestand".
Op deze pagina had ik de nodige links naar FritzBox documentatie.
In de zomer zijn is de documentatie van de De Duitse routerfabrikant AVM verandert naar 'Fritz!', zie: Tweakers.net: FritzBox-maker AVM verandert zijn naam officieel naar 'Fritz!' [05-08-2025]
Opmerking: Onlangs bleek daarnaast dat de AVM-domeinnaam avm.nl automatisch doorverwees naar fritz.nl, wat in retrospectief een aanwijzing was voor de naamsverandering.
Op het moment van schrijven behoudt Fritz de voormalige domeinnaam nog steeds om door te verwijzen naar de nieuwe website.
De links op deze pagina zijn nu aangepast!
![]()
![]()